- Save your entire document as you normally would
- Save your document as a .jpg
- Open a new document Adobe InDesign.
- For the size of your document put your book cover size BEFORE BLEEDS. Make sure your size is in INCHES, not picas.
- Scroll down to the Margins tab. Change ALL margins to ".125in." Make sure your size is in inches. It might automatically convert that number to a picas measurement. (That's ok.)
- Scroll down to the Bleed . This will show you fields for your bleeds.
- Put ".125in." for each of your bleeds. You do not need to change the slug.
- Click CREATE to open your document.
You will see a document with different colored rectangles. The BLACK line is your document size. The PURPLE line is your safe zone. The RED line is your document bleed edge.
- Go to File>Place and place the .jpg of your book cover. It should fit perfectly within the RED bleed lines.
- Save your InDesign file.
- Then go to File>Adobe PDF Presets>High Quality Print
- Name and save your .pdf
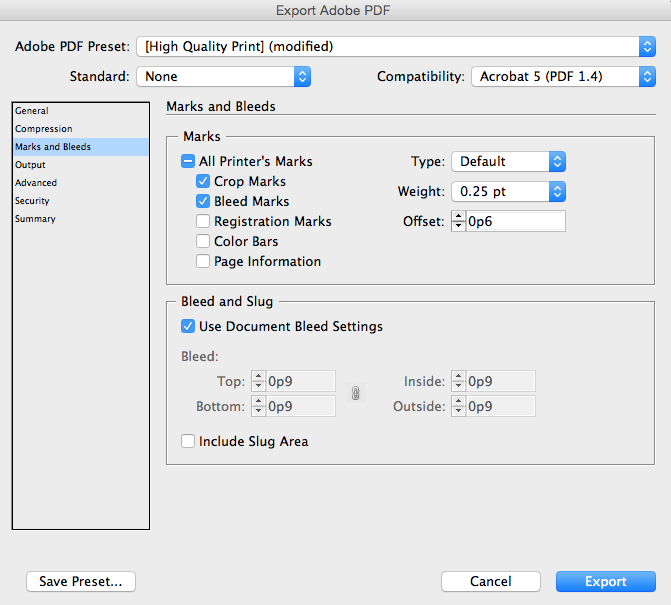
- In the "Marks and Bleeds" tab, make sure the following TWO items are [✓] checked:

- Click "Export"

This whole process generates a .pdf that has markers so you know where your bleeds are and where your cut lines are.